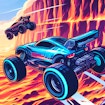
How to Change Garage Door Code: A Complete Guide

Garage security is a top priority for homeowners, and one effective way to enhance it is by regularly changing the garage door code. By doing so, you can prevent unauthorized access and ensure the safety of your belongings. In this article, we will provide you with a step-by-step guide on how to change your garage door code, ensuring a hassle-free experience and peace of mind.

Whether you have a keypad entry system or a remote control, changing the garage door code is a relatively simple process. However, it is essential to understand the specific steps involved to avoid any potential issues. So, let’s dive into the details and explore how you can change your garage door code effortlessly.

Understanding the Garage Door Opener Model

Before attempting to change the code, it is crucial to identify the make and model of your garage door opener. This information will help you locate the necessary instructions and ensure compatibility with the steps outlined in this guide.

Start by looking for a label or sticker on the garage door opener itself. The label should display the manufacturer’s name and model number. If you can’t find the label on the opener, check the user manual or search online using the brand and model name to find the necessary information.

Locating the User Manual

If you still have the user manual that came with your garage door opener, it is an excellent resource for finding detailed instructions on how to change the code. The user manual will provide step-by-step guidance specific to your opener’s make and model, ensuring a seamless code change process.

Online Search

If you don’t have the user manual or can’t find it, a quick online search using the brand and model name of your garage door opener will likely yield useful results. Many manufacturers provide digital copies of their user manuals on their websites, allowing you to access the necessary instructions easily.

Accessing the Garage Door Opener

In this section, we will guide you on how to safely access your garage door opener unit. We will cover important aspects such as disconnecting power and locating the opener’s control panel, allowing you to proceed with changing the code securely.

Power Disconnect

Before accessing the garage door opener, it is essential to disconnect the power source to prevent any accidents or injuries. Locate the power cord attached to the opener and unplug it from the electrical outlet. If your opener is hardwired, you may need to turn off the circuit breaker that supplies power to the opener.

Control Panel Location

Once you have disconnected the power, it’s time to locate the control panel of your garage door opener. The control panel is where you will find the buttons or switches necessary to change the code.

The control panel is typically located near the motor unit of the garage door opener. Look for a metal or plastic box attached to the ceiling or wall of your garage. It may have a hinged cover that can be opened to reveal the controls. In some cases, the control panel may be integrated into the motor unit itself.

READ :  How Long Does it Take to Become an Architect: A Comprehensive Guide

Locating the Learn Button

The learn button is a vital component of your garage door opener that enables you to change the code. We will provide detailed instructions on how to find this button, which may vary depending on your opener’s brand.

Inspect the Control Panel

Open the control panel cover and inspect the interior. Look for a small button or switch labeled “Learn” or “Program” on the control board. The button may be round, square, or rectangular, and it is usually colored differently than the other buttons or switches.

Consult the User Manual

If you can’t find the learn button by inspecting the control panel, refer to the user manual or online resources specific to your garage door opener model. The manual will provide clear instructions on how to locate the learn button, ensuring you can proceed with confidence.

Resetting the Garage Door Opener

Before setting a new code, it is important to reset the garage door opener to its default state. This section will guide you through the process, ensuring a fresh start and a seamless code change.

Locating the Reset Button

Most garage door openers have a reset button that restores the opener to its factory settings. The location of the reset button varies depending on the manufacturer and model of your opener.

Check the control panel for a small button labeled “Reset” or refer to the user manual for its exact location. In some cases, the reset button may be recessed and require a small tool, such as a paperclip or pin, to press it.

Resetting the Opener

Once you have located the reset button, press and hold it for a few seconds. This action will reset the garage door opener to its default settings, erasing any previously programmed codes and configurations.

After releasing the reset button, you may notice lights or indicators on the opener flashing or turning off momentarily. This indicates that the reset process was successful, and the opener is ready to be programmed with a new code.

Programming a New Code

Now that your garage door opener is reset, it’s time to program a new code. We will walk you through the necessary steps, including entering the new code and testing its functionality.

Pressing the Learn Button

To initiate the code programming process, you will need to press the learn button on your garage door opener. The exact sequence of button presses may vary depending on your opener’s brand and model.

Typically, the process involves pressing and releasing the learn button, which activates the programming mode. The learn button may need to be pressed multiple times, or you may need to hold it down for a specific duration. Refer to your opener’s user manual or online resources for the correct button sequence.

Entering the New Code

Once the programming mode is activated, you will need to enter the new code on your garage door opener’s control panel or keypad. The keypad may be integrated into the control panel or a separate device mounted on the wall near the garage door.

Enter the desired code using the numeric keys on the keypad, following any specific instructions provided by the manufacturer. Make sure to choose a code that is easy for you to remember but difficult for others to guess. Avoid using common combinations like your address or birthdate.

READ :  How to Reverse Gum Disease: A Comprehensive Guide to Restoring Your Oral Health

Testing the New Code

After entering the new code, it’s crucial to test its functionality to ensure that it works correctly. Exit the programming mode by pressing the learn button again or following the instructions in your garage door opener’s user manual.

Once you have exited the programming mode, use the keypad or remote control to open and close the garage door. The new code should activate the opener and allow smooth operation of the door. Test the code multiple times to ensure consistent performance.

Syncing the Keypad Entry System

If your garage door has a keypad entry system, it is essential to sync it with the new code. In this section, we will provide you with clear instructions on how to accomplish this, ensuring consistent access using the updated code.

Accessing the Keypad

Locate the keypad near your garage door or on the wall outside the garage. The keypad may be integrated with the control panel or a separate device mounted on the wall.

Open the keypad cover by sliding it up or lifting it to reveal the keypad buttons. Some keypads may require a small tool to remove the cover, such as a screwdriver or a coin.

Syncing with the New Code

After opening the keypad cover, you will typically find a “Sync” or “Learn” button inside. Press and release this button to activate the syncing mode on the keypad.

Once the syncing mode is activated, enter the new code on the keypad using the numeric buttons. The keypad will beep or display indicators to confirm that the new code has been successfully synced.

Reconnecting Power and Testing

After successfully changing the code, reconnecting power is crucial to restore the functionality of your garage door opener. We will guide you through this step and explain how to test the new code to ensure everything is working as expected.

Power Reconnection

To restore power to your garage door opener, plug the power cord back into the electrical outlet if it was disconnected. If your opener is hardwired, turn on the circuit breaker that supplies power to the opener.

Once the power is restored, you may notice lights or indicators on the opener turning on or becoming steady. This indicates that the opener is receiving power and ready for use.

Testing the New Code

After reconnecting power, it’s essential to test the new code to ensure that it activates the garage door opener correctly. Use the keypad or remote control to open and close the garage door multiple times, observing the door’s smooth operation.

If the door opens and closes smoothly without any issues, it means the new code has been successfully programmed, and the garage door opener is functioning correctly. However, if you encounter any problems or the door doesn’t respond asexpected, refer to the troubleshooting section below for possible solutions.

Troubleshooting

Encountering issues during the code change process can be frustrating. In this section, we will address common troubleshooting scenarios and provide solutions to help you overcome any obstacles.

Code Not Being Accepted

If you enter the new code but the garage door opener doesn’t accept it, there may be a few reasons for this. First, ensure that you are following the correct sequence of button presses or keypad entries as specified by your garage door opener’s manufacturer.

If the code still doesn’t work, consider resetting the garage door opener again and repeating the code programming process from the beginning. Sometimes, a second attempt can resolve any glitches that may have occurred during the initial programming.

Keypad Not Syncing

If you have a keypad entry system and it fails to sync with the new code, there are a few troubleshooting steps you can take. First, ensure that you are pressing the sync or learn button on the keypad within the specified timeframe after activating the syncing mode on the garage door opener.

READ :  How to Change a Pool Light: A Step-by-Step Guide

Additionally, check the batteries in the keypad to ensure they have enough power. Weak or dead batteries can prevent the keypad from syncing properly. Replace the batteries if necessary and attempt the syncing process again.

Opener Not Responding

If your garage door opener doesn’t respond at all after changing the code, there may be an issue with the power supply. Double-check that you have reconnected the power correctly and that the electrical outlet or circuit breaker is functioning properly.

If the power supply is not the issue, it is possible that the garage door opener’s control circuitry has encountered a problem during the code change process. In such cases, it may be necessary to consult a professional technician to diagnose and repair the opener.

Additional Security Measures

While changing the garage door code enhances security, implementing additional measures can further fortify your garage against potential threats. We will discuss some valuable tips and recommendations to maximize the safety of your garage and its contents.

Install Security Cameras

Consider installing security cameras in and around your garage to monitor any suspicious activities. Visible cameras act as a deterrent, while hidden cameras can help capture evidence in case of a break-in.

Modern security cameras often provide remote viewing capabilities, allowing you to monitor your garage from your smartphone or computer. This feature enhances convenience and peace of mind, especially when you are away from home.

Upgrade to a Smart Garage Door Opener

Smart garage door openers offer advanced security features and remote control capabilities. With a smart opener, you can receive real-time notifications whenever your garage door is opened or closed, ensuring that you are always aware of its status.

Additionally, smart openers often integrate with home automation systems, allowing you to control your garage door through voice commands or smartphone apps. This level of control and automation adds an extra layer of security to your garage.

Secure the Garage Entry Door

Remember that the garage entry door is another potential point of vulnerability. Install a sturdy deadbolt lock and reinforce the door with a door frame reinforcement kit to prevent forced entry.

Consider adding a peephole or a security camera facing the garage entry door to monitor anyone who approaches or attempts to gain unauthorized access.

Use Timers for Garage Lighting

Keeping your garage well-lit is an effective deterrent against potential intruders. Install timers or motion-sensor lights to ensure that the garage area is well-illuminated during the night.

Timers can be programmed to turn the lights on and off at specific times, creating the illusion of occupancy even when you are away from home. This helps maintain the appearance of an active and secure property.

Secure Garage Windows

If your garage has windows, reinforce them with security film or install window bars to prevent easy access. This prevents potential intruders from breaking the windows and gaining entry into your garage.

Consider using window coverings or blinds to obscure the view inside the garage, preventing prying eyes from assessing the contents of your garage and potentially tempting thieves.

Regularly Inspect and Maintain the Garage Door

Perform regular inspections and maintenance on your garage door to ensure its proper functioning and security. Check for any signs of wear and tear, such as loose hinges, damaged panels, or worn-out weatherstripping.

Keep the garage door clean and lubricate the moving parts, such as the rollers, tracks, and hinges, to prevent rust and ensure smooth operation. Regular maintenance helps extend the lifespan of your garage door and enhances its overall security.

Educate Your Family and Housemates

Lastly, educate your family members or housemates about the importance of garage security and the proper use of the garage door code. Emphasize the necessity of keeping the code confidential and avoiding sharing it with anyone outside the household.

Encourage everyone to be vigilant and report any suspicious activities or individuals around the garage area. By fostering a culture of security awareness, you create a united front against potential security threats.

By implementing these additional security measures and integrating them with your garage door code change, you create a comprehensive and robust security system for your garage, ensuring the protection of your property and loved ones.

Jhonedy Cobb

Journey into the Depths of Information with Siresays.com

Related Post

Leave a Comment